
How to Clean a Keurig Coffee Pot: A Comprehensive Guide for Optimal Brewing
The Keurig coffee maker has revolutionized the way we consume our daily dose of caffeine. Its single-serve convenience and variety of K-Cup options have made it a staple in countless homes and offices. However, like any appliance that handles food and beverages, the Keurig requires regular cleaning to ensure optimal performance, taste, and longevity. This guide provides a comprehensive, step-by-step approach on how to clean a Keurig coffee pot, ensuring you continue to enjoy a perfect cup every time.
Neglecting to clean your Keurig can lead to a build-up of mineral deposits, stale coffee oils, and even mold. This not only affects the taste of your coffee but can also clog the machine, reducing its efficiency and potentially shortening its lifespan. Regular cleaning is, therefore, not merely a suggestion, but a necessity for maintaining your Keurig in top condition. This guide will walk you through the essential steps, from basic cleaning to deep cleaning, ensuring your Keurig operates at its best.
Understanding the Importance of Cleaning Your Keurig
Before diving into the cleaning process, it’s crucial to understand why cleaning your Keurig is so important. The primary culprit behind the need for cleaning is mineral build-up, particularly calcium and magnesium, which are commonly found in tap water. These minerals accumulate inside the machine, forming a chalky residue that can clog the internal components. This residue can impede water flow, affect brewing temperature, and ultimately impact the taste of your coffee. Furthermore, coffee oils and grounds can accumulate over time, leading to a bitter or stale flavor. Regular cleaning not only addresses these issues but also prevents the growth of mold and bacteria, ensuring a hygienic brewing process.
The frequency of cleaning depends on several factors, including how often you use your Keurig, the hardness of your water, and the type of beverages you brew. As a general rule, you should descale your Keurig every 1-3 months, depending on usage. In addition to descaling, you should perform a basic cleaning after every 1-2 weeks, or more frequently if you notice any changes in taste or performance. This proactive approach will help extend the life of your machine and guarantee a consistently delicious cup of coffee.
Essential Supplies You’ll Need
Before you start cleaning your Keurig, gather the necessary supplies. Having everything ready will make the process much smoother and more efficient. Here’s a checklist of what you’ll need:
- White Vinegar: This is the primary descaling agent. It’s effective at dissolving mineral deposits.
- Water: Distilled or filtered water is recommended to minimize mineral build-up.
- Dish Soap: Mild dish soap is needed for cleaning removable parts.
- Soft Cloth or Sponge: For wiping down the exterior and removable parts. Avoid abrasive scrubbers that could scratch the surfaces.
- Large Mug or Container: To catch the cleaning solution during the brewing cycle.
- Optional: Keurig Descaling Solution (if preferred).
Having these supplies at hand will enable you to thoroughly clean your Keurig and maintain its optimal performance. Remember to always consult your Keurig’s user manual for specific cleaning instructions and recommendations. However, the steps outlined below apply to most Keurig models.
Step-by-Step Guide to Cleaning Your Keurig
Cleaning your Keurig involves several steps, from basic cleaning to descaling. Following these steps meticulously will ensure a thorough clean and maintain your machine’s performance.
Step 1: Preparing Your Keurig
Before you begin, unplug your Keurig and allow it to cool down. Remove the water reservoir, the K-Cup holder, and the drip tray. These parts need to be cleaned separately. Empty any remaining water from the water reservoir.
Step 2: Cleaning the Removable Parts
Wash the water reservoir, K-Cup holder, and drip tray with warm, soapy water. Use a mild dish soap and a soft cloth or sponge. Rinse thoroughly to remove all traces of soap. These parts can also be washed in the top rack of your dishwasher, depending on the model. Ensure all parts are completely dry before reassembling the machine.
Step 3: Descaling Your Keurig
Descaling removes mineral build-up. This is a crucial step in the process of how to clean a Keurig coffee pot. Follow these steps for effective descaling:
- Prepare the Descaling Solution: Mix equal parts white vinegar and water in the water reservoir. Alternatively, you can use a commercial descaling solution according to the product instructions.
- Run the Brewing Cycle: Place a large mug or container on the drip tray to catch the solution. Run the Keurig through a brewing cycle without a K-Cup. Repeat this process until the water reservoir is empty.
- Rinse with Fresh Water: Refill the water reservoir with fresh water and run the Keurig through several brewing cycles (without a K-Cup) to rinse out any remaining vinegar or descaling solution.
This process should be repeated every 1-3 months, or more frequently if you notice a decline in performance or taste.
Step 4: Cleaning the Exterior
Wipe down the exterior of the Keurig with a damp cloth or sponge. Avoid using harsh chemicals or abrasive cleaners. Pay attention to areas where coffee spills or splashes might occur. Ensure that the exterior is completely dry before plugging the machine back in.
Step 5: Reassembling Your Keurig
Once all parts are clean and dry, reassemble your Keurig. Replace the water reservoir, K-Cup holder, and drip tray. Fill the water reservoir with fresh water. Your Keurig is now clean and ready for brewing.
Troubleshooting Common Cleaning Issues
Even with regular cleaning, you might encounter some issues. Here are some common problems and their solutions:
- Slow Brewing: This is often caused by mineral build-up. Descale your Keurig to resolve this.
- Weak Coffee: This could be due to clogged needles or mineral deposits. Clean the needles and descale the machine.
- Unpleasant Taste: This might indicate a need for descaling or cleaning of removable parts. Ensure that all parts are thoroughly cleaned and that the machine is properly descaled.
- Machine Not Brewing: This could be due to a clog or malfunction. Consult your Keurig’s user manual or contact customer support for assistance.
If you’re still experiencing problems after cleaning, refer to your Keurig’s user manual or contact customer support. Regular maintenance and cleaning are the keys to preventing these issues.
Advanced Cleaning Tips and Maintenance
Beyond the basic cleaning steps, there are some advanced tips and maintenance practices that can further enhance the performance and lifespan of your Keurig.
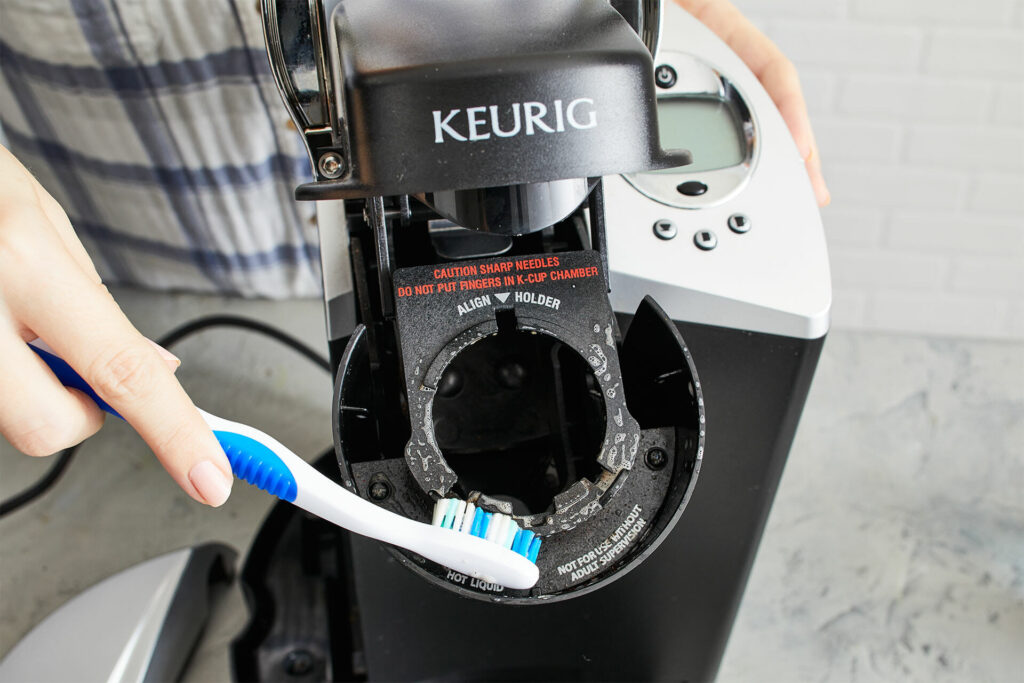
- Clean the K-Cup Holder Needles: The needles that pierce the K-Cup can become clogged with coffee grounds. Use a paper clip or the cleaning tool that came with your Keurig to unclog them.
- Use Filtered Water: Using filtered water reduces mineral build-up and improves the taste of your coffee.
- Regularly Clean the Water Reservoir: Even when using filtered water, the water reservoir can accumulate residue. Clean it regularly with warm, soapy water.
- Store Your Keurig Properly: If you won’t be using your Keurig for an extended period, empty the water reservoir and store the machine in a clean, dry place.
- Inspect for Leaks: Periodically check your Keurig for any leaks. If you find any, contact customer support or a qualified technician.
By incorporating these advanced tips into your cleaning routine, you can ensure that your Keurig continues to brew delicious coffee for years to come.
Choosing the Right Cleaning Products
When it comes to cleaning products, the choice can seem overwhelming. While white vinegar is a cost-effective and readily available option, there are also commercial descaling solutions designed specifically for Keurig machines. These solutions often contain citric acid or other descaling agents that are effective at removing mineral deposits. When choosing a cleaning product, consider the following factors:
- Effectiveness: Choose a product that is proven to remove mineral deposits and coffee oils effectively.
- Ease of Use: Opt for a product that is easy to use and follows simple instructions.
- Safety: Ensure that the product is safe for use with food and beverages and does not contain harmful chemicals.
- Compatibility: Check that the product is compatible with your specific Keurig model.
Whether you choose white vinegar or a commercial descaling solution, make sure to follow the manufacturer’s instructions carefully. Using the wrong cleaning products or not following the instructions can damage your Keurig and void your warranty.
Frequently Asked Questions About Cleaning Keurigs
Here are some frequently asked questions about how to clean a Keurig coffee pot:
- How often should I clean my Keurig? You should descale your Keurig every 1-3 months and perform a basic cleaning every 1-2 weeks.
- Can I use other descaling solutions besides white vinegar? Yes, you can use commercial descaling solutions designed for Keurig machines.
- Can I put the K-Cup holder in the dishwasher? Yes, most K-Cup holders are dishwasher safe.
- What if my Keurig still brews slowly after descaling? Check the needles for clogs and repeat the descaling process. If the problem persists, contact customer support.
- Is it safe to use vinegar to clean my Keurig? Yes, white vinegar is safe and effective for cleaning Keurigs. Make sure to rinse thoroughly with fresh water after descaling.
These FAQs address some of the most common questions regarding how to clean a Keurig coffee pot, providing clarity and guidance for users. [See also: Related Article Titles]
Conclusion: Maintaining Your Keurig for the Perfect Brew
Knowing how to clean a Keurig coffee pot is essential for maintaining its performance and ensuring that you enjoy a consistently delicious cup of coffee. Regular cleaning, descaling, and maintenance will not only extend the life of your machine but also prevent the build-up of mineral deposits, coffee oils, and mold. By following the step-by-step guide outlined in this article, you can keep your Keurig in top condition, ensuring it continues to brew the perfect cup of coffee for years to come. Remember to use the appropriate cleaning supplies, follow the recommended cleaning schedule, and address any issues promptly. With proper care, your Keurig will remain a reliable and convenient appliance, providing you with your daily caffeine fix with ease.

