From Rust to Road Trip: A Comprehensive Guide on How to Renovate a Camper
The open road beckons, but your dream of adventure is currently confined to a dilapidated camper, a relic of a bygone era. The thought of breathing new life into this mobile haven, transforming it into a comfortable and stylish travel companion, might seem daunting. However, with the right planning, tools, and a healthy dose of determination, learning how to renovate a camper can be an incredibly rewarding experience. This comprehensive guide will walk you through every step of the process, from initial assessment to the final touches, ensuring your camper renovation journey is as smooth and enjoyable as possible.
Planning and Preparation: Laying the Groundwork for Success
Before you even pick up a wrench, meticulous planning is crucial. This phase will determine the overall success and efficiency of your camper renovation. Consider it the foundation upon which your entire project will be built.
Assessing the Current State
Begin with a thorough inspection. Document everything. Take photos and videos of existing damage, noting the condition of the following:
- The Exterior: Check for rust, leaks, damage to the roof, windows, and body panels. A leaky roof is a common culprit and a major issue that must be addressed immediately.
- The Interior: Evaluate the condition of the flooring, walls, ceiling, and existing fixtures. Look for signs of water damage, mold, and mildew.
- Mechanical Systems: Inspect the electrical system, plumbing, heating, and air conditioning (if applicable). Test all appliances and systems.
- Chassis and Undercarriage: Examine the frame for rust or structural damage. Check the tires, brakes, and suspension.
Create a detailed inventory of all existing components and their condition. This assessment will inform your budget and project scope.
Developing a Budget and Timeline
Renovating a camper can be expensive. Establish a realistic budget that accounts for materials, tools, permits (if required), and potential unforeseen expenses. Research the cost of materials, appliances, and any professional services you might need.
Create a realistic timeline. Camper renovations often take longer than anticipated. Break down the project into smaller, manageable tasks and assign estimated completion dates. This will help you stay organized and track your progress. Consider seasonality and potential weather delays.
Designing Your Dream Camper
Visualize your ideal camper. Research different layouts, styles, and design elements. Consider your travel needs and lifestyle. Do you need a dedicated sleeping area, a full kitchen, and a bathroom? Are you planning on boondocking (camping without hookups)? The answers to these questions will guide your design choices. Sketch out your plans, create a mood board, and gather inspiration from online sources like Pinterest, Instagram, and dedicated camper renovation blogs. [See also: Camper Renovation Design Ideas]
Demolition and Preparation: Stripping it Down
Once you have a plan, it’s time to start the demolition process. This is where the old camper gets a new lease on life. This stage can be messy, so prepare your workspace accordingly. Protect yourself with appropriate safety gear, including gloves, eye protection, and a dust mask.
Removing Existing Components
Carefully remove all existing fixtures, appliances, flooring, cabinets, and any other components that will be replaced. Label and organize everything to avoid confusion during reassembly. Take photos during the demolition process to serve as a reference for reinstallation.
Addressing Structural Issues
Inspect the frame for any rust or structural damage. Repair or replace any compromised sections. Address any leaks or water damage by repairing or replacing damaged wood and ensuring proper sealing. This is a crucial step to ensure the longevity of your renovated camper. [See also: Camper Frame Repair Guide]
Cleaning and Surface Preparation
Thoroughly clean all surfaces, removing any dirt, debris, and old adhesive. Sand down surfaces to create a smooth base for new materials. This includes walls, floors, and any other areas that will be refinished. Proper surface preparation is critical for ensuring that new materials adhere properly.
Rebuilding and Refurbishing: Bringing Your Vision to Life
With the demolition complete and the surfaces prepared, it’s time to start rebuilding. This phase involves the installation of new components and the implementation of your design plans.
Flooring Installation
Choose a durable and water-resistant flooring material. Consider options like vinyl plank flooring, laminate, or even marine-grade plywood with a sealant. Install the flooring according to the manufacturer’s instructions. Ensure proper sealing around the edges to prevent water intrusion. Consider the weight of the flooring material as this impacts the overall weight of the camper.
Wall and Ceiling Finishes
Install new wall and ceiling panels. Consider materials like plywood, paneling, or even shiplap for a rustic look. Insulate the walls and ceiling to improve the camper’s energy efficiency and comfort. Proper insulation is crucial for regulating temperature and preventing condensation. [See also: Camper Insulation Tips]
Cabinetry and Furniture
Build or install new cabinets and furniture. Consider using lightweight materials to minimize the camper’s weight. Design the layout to maximize space and functionality. Incorporate storage solutions to make the most of every inch of space. Pre-fabricated cabinet kits can save time and effort.
Electrical and Plumbing Systems
Upgrade the electrical system if necessary. Ensure that all wiring meets current safety standards. Install new outlets, switches, and lighting fixtures. Consider adding solar panels for off-grid power. Inspect and repair or replace any damaged plumbing. Install new water tanks, pumps, and fixtures. Ensure proper ventilation to prevent moisture buildup. Hire a qualified electrician and plumber if you are not comfortable working with these systems.
Finishing Touches and Final Inspections: The Grand Reveal
With the major components installed, it’s time for the finishing touches. This is where you personalize your camper and add those extra details that make it truly your own.
Painting and Decorating
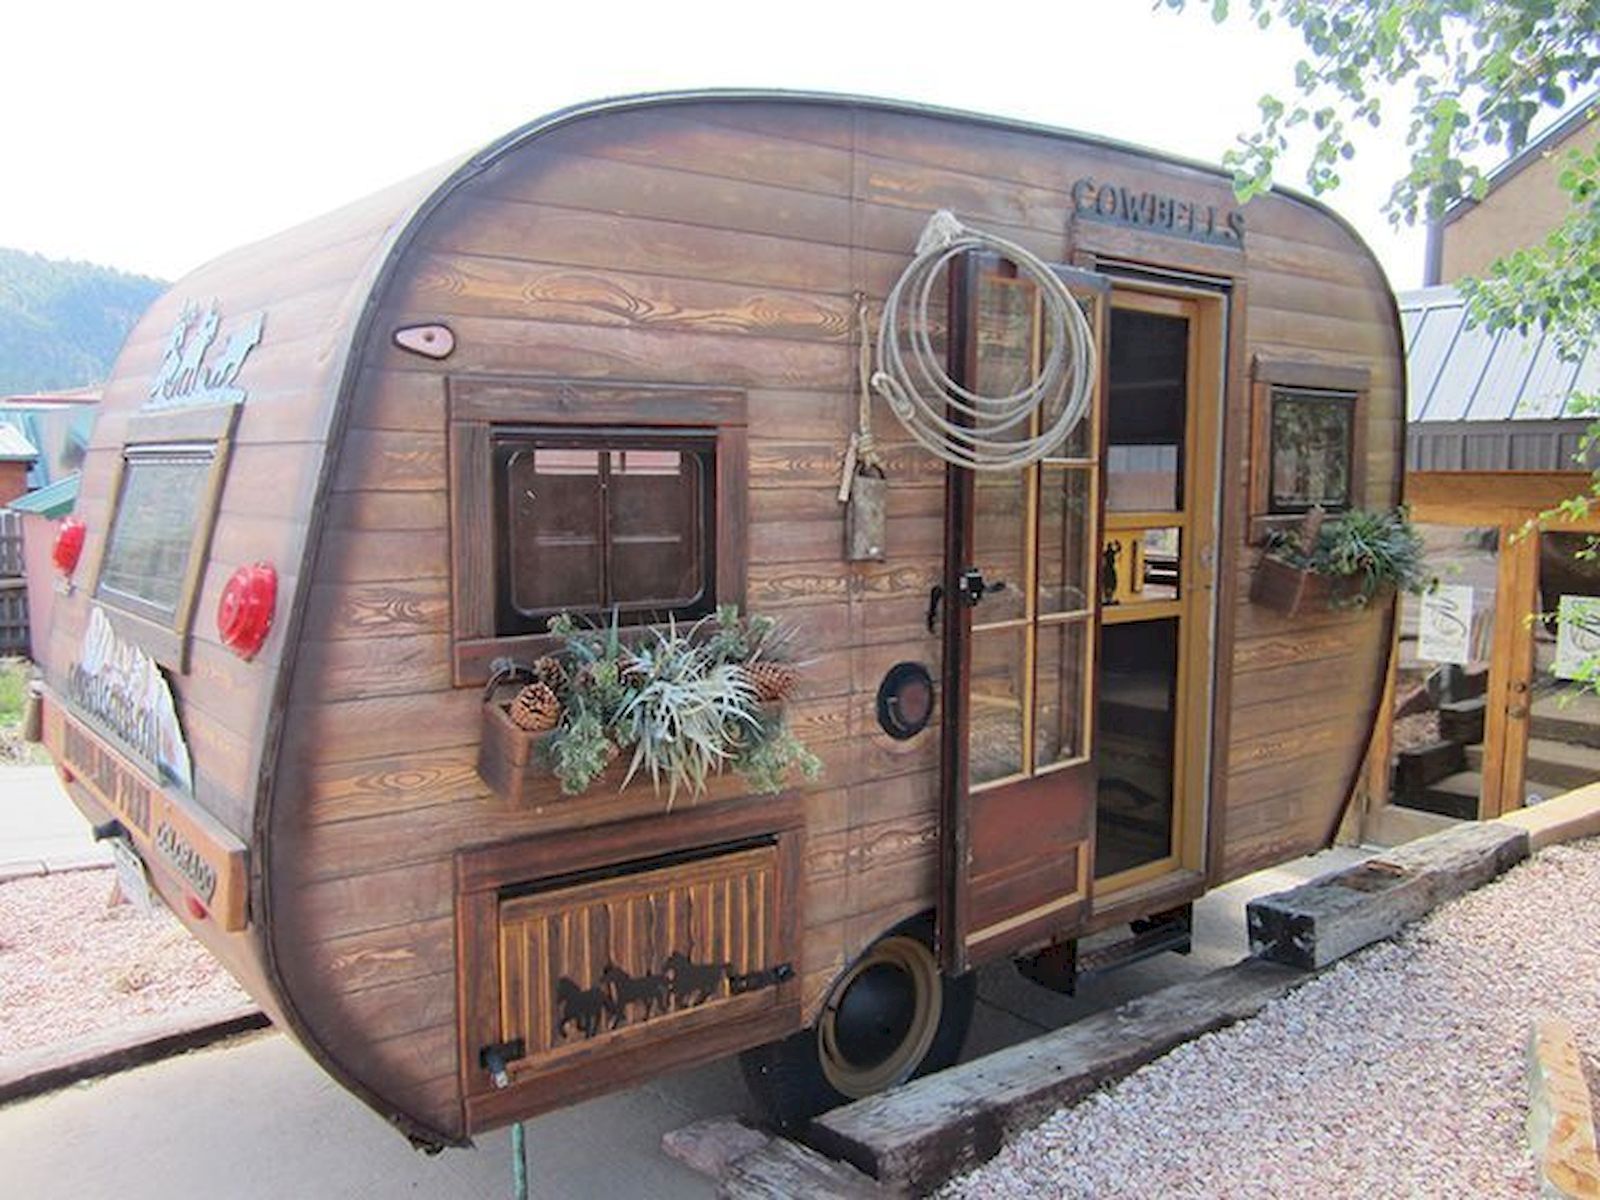
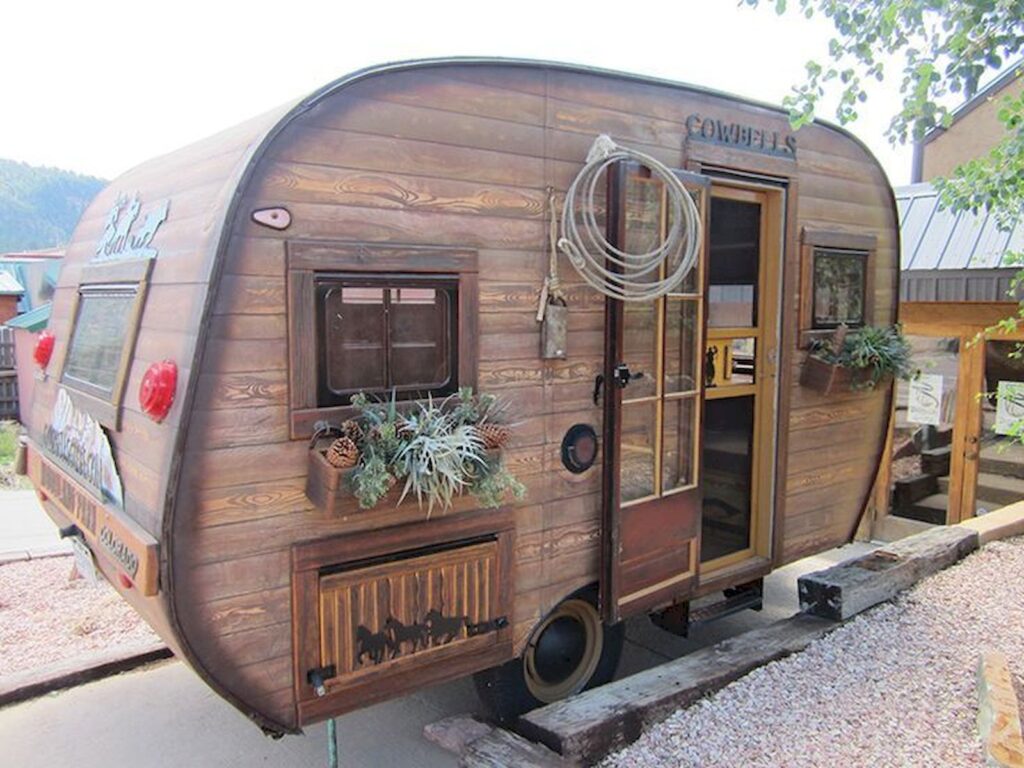
Paint the walls, cabinets, and any other surfaces that require it. Choose colors and finishes that reflect your style and create a comfortable and inviting atmosphere. Add decorative elements like curtains, throw pillows, and artwork to personalize the space.
Appliance Installation
Install new appliances such as a refrigerator, stove, and microwave. Ensure that all appliances are properly connected and functioning correctly. Follow the manufacturer’s instructions for installation and operation. Consider the energy efficiency of your appliances, especially if you plan to use solar power.
Final Inspections and Testing
Conduct a final inspection to ensure that all systems are functioning correctly. Test all appliances, electrical outlets, and plumbing fixtures. Check for any leaks or drafts. Make any necessary adjustments or repairs. Inspect the exterior for any remaining issues. Before hitting the road, make sure everything is working properly and that you are prepared for any potential issues.
Maintaining Your Renovated Camper: Preserving Your Investment
Renovating a camper is an investment. Regular maintenance will help to preserve your hard work and extend the lifespan of your camper. Here are some tips for maintaining your renovated camper:
- Regular Cleaning: Clean the interior and exterior of your camper regularly.
- Preventative Maintenance: Perform regular maintenance on your appliances, plumbing, and electrical systems. Follow the manufacturer’s recommendations for maintenance schedules.
- Roof Inspections: Inspect the roof regularly for leaks and damage. Repair any issues promptly.
- Sealing: Check and reseal all seams and joints to prevent water intrusion.
- Storage: Store your camper properly when not in use. Cover the camper to protect it from the elements.
Renovating a camper can be a challenging but rewarding experience. By following these steps, you can transform a tired old camper into a comfortable and stylish travel companion. Remember to take your time, plan carefully, and enjoy the process. The open road awaits!
The journey of how to renovate a camper is a testament to the power of dedication and resourcefulness. From the initial assessment of a neglected vehicle to the final touches of a customized interior, the process offers a unique blend of hands-on work and creative vision. The rewards are immeasurable: the satisfaction of creating something with your own hands, the freedom of the open road, and the joy of making lasting memories. Taking on the project of how to renovate a camper is not just about building a vehicle; it’s about building an experience.
For those considering how to renovate a camper, the first step is always the most crucial: the decision to begin. Armed with a plan, a toolkit, and a little bit of courage, you’ll be well on your way to a memorable adventure. The knowledge of how to renovate a camper is a valuable skill, opening doors to exploration and the creation of personalized travel experiences. Embrace the challenge, and enjoy the journey. [See also: Camper Renovation Mistakes to Avoid]
The process of how to renovate a camper emphasizes the importance of thorough preparation, meticulous execution, and a keen eye for detail. From addressing structural issues to selecting the perfect paint color, every decision shapes the final outcome. The ability to understand how to renovate a camper is a gateway to creating a space that reflects your personal style and meets your unique travel needs. Whether you are a seasoned DIY enthusiast or a novice, the journey of how to renovate a camper offers a rewarding opportunity to learn, grow, and create something truly special.
Learning how to renovate a camper is a journey that combines practical skills with creative expression. It’s a chance to transform a neglected vehicle into a personalized haven on wheels. By understanding the steps and embracing the challenges, you can embark on an adventure that is both fulfilling and empowering. The knowledge of how to renovate a camper offers the ultimate reward: the freedom to explore the world on your own terms.
The knowledge of how to renovate a camper is a gift that keeps on giving. It’s about creating a space that perfectly suits your needs and reflects your personal style. The process of how to renovate a camper is a testament to the power of creativity, perseverance, and the desire for adventure. The journey of how to renovate a camper provides the freedom to travel on your own terms.
When you learn how to renovate a camper, you are gaining a valuable skillset. The process of how to renovate a camper is an investment in your freedom and your future. Understanding how to renovate a camper offers unique travel opportunities. The process of how to renovate a camper is a journey and an adventure.

