From Bean to Bliss: Crafting the Perfect Chocolate Covered Espresso Bean
In the realm of confectionery delights, few treats possess the captivating duality of chocolate-covered espresso beans. They offer a symphony of sensations: the initial snap of rich chocolate, followed by the invigorating jolt of coffee, and a lingering, satisfying bitterness. Mastering the art of how to make chocolate covered espresso beans is a journey that blends culinary precision with the simple pleasure of indulgence. This guide provides a comprehensive roadmap, ensuring your homemade creations rival the finest artisan confections.
The Allure of Homemade Treats
The appeal of crafting your own chocolate-covered espresso beans extends beyond mere cost savings. It’s about control – the ability to select premium ingredients, tailor the intensity of the coffee flavor, and experiment with diverse chocolate profiles. Furthermore, the process itself is therapeutic, a mindful engagement that culminates in a delectable reward. The satisfaction of gifting a batch of homemade chocolate-covered espresso beans, knowing the recipient will savor each meticulously crafted piece, is unparalleled.
Gathering Your Arsenal: Ingredients and Equipment
Before embarking on your culinary adventure, assembling the right ingredients and equipment is paramount. Quality ingredients are the foundation of exceptional results. This section details everything you need to know about procuring the best components for your chocolate-covered espresso bean creation.
The Coffee Bean: Choosing Your Champion
The heart of the confection lies in the espresso bean. Opt for high-quality, freshly roasted beans. Consider these factors:
- Roast Level: Darker roasts typically impart a more robust coffee flavor, while lighter roasts offer a brighter, more nuanced experience. Experiment to find your preference.
- Bean Origin: Single-origin beans highlight specific flavor profiles, while blends offer a more complex taste. Explore different origins to discover your favorites.
- Freshness: Stale beans will result in a muted flavor. Purchase beans from a reputable roaster and store them properly (in an airtight container, away from light and heat).
The choice of bean significantly impacts the final product. Remember that the goal is to balance the coffee flavor with the chocolate. The best beans for how to make chocolate covered espresso beans will be those that you enjoy the most.
The Chocolate: Selecting Your Canvas
The chocolate you select serves as the canvas for your coffee masterpiece. Consider these options:
- Dark Chocolate: Offers a sophisticated bitterness that complements the coffee’s intensity. Look for percentages ranging from 60% to 70% cacao for a balanced flavor.
- Milk Chocolate: Provides a sweeter, creamier contrast to the coffee, appealing to a broader audience.
- White Chocolate: Creates a visually striking confection and offers a unique flavor profile, although it lacks the antioxidant benefits of dark chocolate.
- Quality Matters: Choose chocolate with a high cocoa butter content for a smooth, glossy finish. Avoid chocolate containing vegetable oils, as they can affect the texture.
The type of chocolate you choose will drastically change the experience of how to make chocolate covered espresso beans. Consider what you want the final product to taste like.
Essential Equipment: Tools of the Trade
Gathering the right tools ensures a smooth and efficient process. You’ll need:
- Double Boiler or Heat-Safe Bowl and Saucepan: For melting the chocolate gently.
- Thermometer: To monitor the chocolate’s temperature accurately.
- Spatula or Spoon: For stirring and coating the beans.
- Parchment Paper or Silicone Mat: To set the chocolate-covered beans.
- Baking Sheet: To hold the parchment paper or silicone mat.
- Optional: Chocolate tempering tools, candy thermometer, and dipping forks (for a more professional finish).
With the right tools, you can begin to understand how to make chocolate covered espresso beans in a more professional manner.
The Culinary Process: A Step-by-Step Guide
Now, let’s delve into the practical aspects of how to make chocolate covered espresso beans. This section provides a detailed, step-by-step guide to ensure your success.
Step One: Melting the Chocolate
This is a crucial step, as improper melting can result in a grainy or burnt chocolate. Use a double boiler or create a makeshift one by placing a heat-safe bowl over a saucepan of simmering water. Ensure the bowl doesn’t touch the water. Break the chocolate into small pieces and place it in the bowl. Stir frequently until the chocolate is almost completely melted.
- Temperature Control: For dark chocolate, aim for a melting temperature of around 115-120°F (46-49°C). For milk and white chocolate, keep the temperature slightly lower, around 105-110°F (40-43°C).
- Tempering (Optional): For a glossy, snap-able finish, consider tempering your chocolate. This involves heating the chocolate to a specific temperature, cooling it, and then reheating it to a working temperature. Tempering requires more precision but yields superior results.
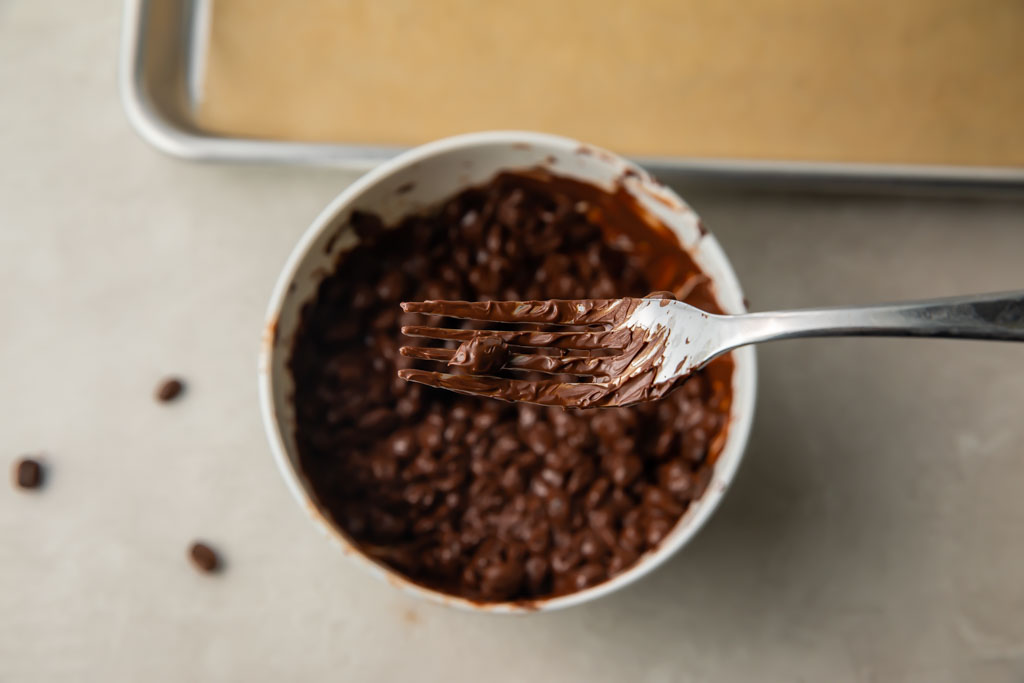
Step Two: Coating the Espresso Beans
Once the chocolate is melted and tempered (if applicable), remove it from the heat. Add the espresso beans to the melted chocolate. Using a spatula or spoon, gently toss the beans to ensure they are evenly coated. Avoid overmixing, which can cause the chocolate to seize.
- Technique: You can use a dipping fork to remove individual beans, or you can pour the chocolate-covered beans onto a parchment-lined baking sheet.
- Even Coating: Ensure each bean is fully covered for optimal flavor and appearance.
Step Three: Setting and Cooling
Carefully transfer the chocolate-covered beans to a parchment paper-lined baking sheet or silicone mat. Separate the beans to prevent them from clumping together. Allow the chocolate to set completely at room temperature or in the refrigerator. Avoid placing them in the freezer, as this can cause condensation and affect the texture.
- Cooling Time: The cooling time will vary depending on the chocolate and the ambient temperature. It typically takes 30 minutes to an hour at room temperature and 15-20 minutes in the refrigerator.
- Appearance: Properly set chocolate will be firm to the touch and have a glossy sheen.
Step Four: Storage and Enjoyment
Once the chocolate-covered espresso beans are set, they are ready to be enjoyed! Store them in an airtight container at room temperature or in a cool, dry place. This will help maintain their freshness and prevent the chocolate from blooming (developing a white coating).
- Shelf Life: Properly stored chocolate-covered espresso beans can last for several weeks.
- Serving Suggestions: Enjoy them as a standalone treat, a delightful accompaniment to coffee, or as a unique gift.
Now you know how to make chocolate covered espresso beans! Enjoy!
Advanced Techniques: Elevating Your Creations
Once you’ve mastered the basics of how to make chocolate covered espresso beans, consider these advanced techniques to elevate your creations:
Flavor Infusion
Experiment with adding flavors to the chocolate. Consider:
- Extracts: Add a few drops of peppermint, orange, or vanilla extract to the melted chocolate for a unique twist.
- Spices: Incorporate a pinch of sea salt, cayenne pepper, or cinnamon to enhance the flavor profile.
- Nuts and Seeds: Sprinkle chopped nuts or seeds over the chocolate-covered beans before they set for added texture and flavor.
Tempering Mastery
Tempering chocolate, while demanding, is a worthwhile skill. It ensures a beautiful sheen and a satisfying snap. Research the specific tempering methods for your chosen chocolate type.
Dipping Techniques
Refine your dipping skills for a more professional finish. Using dipping forks and practicing consistent techniques will improve the appearance of your chocolate-covered espresso beans.
Troubleshooting Common Issues
Even the most experienced confectioners encounter challenges. Here’s how to troubleshoot common problems:
- Chocolate Seizing: If the chocolate becomes thick and grainy, it may have come into contact with water. Discard the batch and start again, ensuring your bowl and utensils are completely dry.
- Blooming: If the chocolate develops a white coating, it may be due to improper storage or temperature fluctuations. Store the beans in a cool, dry place.
- Uneven Coating: If the coating is uneven, ensure the beans are thoroughly tossed in the chocolate. Use a dipping fork for more control.
Understanding these common issues is part of the process of how to make chocolate covered espresso beans.
The Final Word: Embracing the Journey
Learning how to make chocolate covered espresso beans is a rewarding endeavor. It’s a journey of discovery, experimentation, and, most importantly, enjoyment. Don’t be discouraged by initial setbacks. Each batch is an opportunity to refine your skills and explore new flavor combinations. With patience and practice, you’ll be crafting exquisite chocolate-covered espresso beans that will delight your friends, family, and, of course, yourself. The process is a delightful fusion of culinary technique and the simple joy of creating something delicious. So, gather your ingredients, embrace the process, and savor the moment. Your perfect chocolate-covered espresso bean awaits!
[See also: Best Coffee Bean Brands for Chocolate Coating]
[See also: Chocolate Tempering Techniques for Beginners]
[See also: Flavor Pairing Guide: Espresso and Chocolate]

