Brewing Brilliance: The Definitive Guide on How to Clean a Coffee Maker with Vinegar and Water
The aroma of freshly brewed coffee is a morning ritual for millions. That rich, comforting scent, however, can quickly turn sour if your coffee maker isn’t properly maintained. Over time, mineral deposits, oils, and coffee grounds can build up, leading to a decline in coffee quality and potentially damaging the appliance. Fortunately, a simple and effective solution exists: learning how to clean a coffee maker with vinegar and water.
This guide provides a comprehensive overview of the process, ensuring your coffee maker remains in peak condition and your morning brew tastes its absolute best. We’ll delve into why cleaning is essential, the supplies you’ll need, step-by-step instructions, and tips for maintaining a sparkling coffee maker.
The Unseen Culprit: Why Cleaning Your Coffee Maker Matters
Coffee makers, especially those used daily, are breeding grounds for buildup. The primary culprits are:
- Mineral Deposits: Hard water contains minerals like calcium and magnesium. These minerals leave behind scale, which accumulates inside the coffee maker, particularly in the heating element and water reservoir.
- Coffee Oils: Coffee beans contain oils that are extracted during brewing. These oils can coat the interior of the coffee maker, leading to a rancid taste and smell over time.
- Coffee Grounds: Even with careful handling, some coffee grounds inevitably escape the filter and settle in the machine. These grounds contribute to a musty odor and can clog the system.
Failing to address these issues can result in:
- Poor Coffee Taste: Mineral buildup and oil residue can significantly alter the flavor of your coffee, making it taste bitter or stale.
- Reduced Performance: Scale can clog the system, reducing the efficiency of the heating element and slowing down the brewing process.
- Potential Damage: Severe mineral buildup can damage the heating element and other components, potentially shortening the lifespan of your coffee maker.
- Health Concerns: While not directly harmful, a dirty coffee maker can harbor bacteria and mold, which can impact your overall health.
Regular cleaning, using methods like how to clean a coffee maker with vinegar and water, is crucial to prevent these problems.
Gathering Your Arsenal: Supplies You’ll Need
The beauty of cleaning a coffee maker with vinegar and water is its simplicity. You likely already have the necessary supplies at home. Here’s what you’ll need:
- White Vinegar: This is the star of the show. Its acidity effectively dissolves mineral deposits and cuts through oil residue.
- Water: Clean, fresh water.
- Coffee Maker: The appliance you are cleaning.
- Measuring Cup: To accurately measure the vinegar and water mixture.
- Coffee Filter: This is optional, but recommended, for the final rinse to catch any remaining debris.
- Bowl or Container: For mixing the vinegar and water solution.
Step-by-Step Guide: How to Clean a Coffee Maker with Vinegar and Water
Now, let’s get down to the nitty-gritty. Here’s a detailed guide on how to clean a coffee maker with vinegar and water:
- Prepare the Cleaning Solution: In a bowl or container, mix equal parts white vinegar and water. A typical ratio is 1:1. For example, use 2 cups of vinegar and 2 cups of water. Adjust the amount based on the size of your coffee maker’s water reservoir.
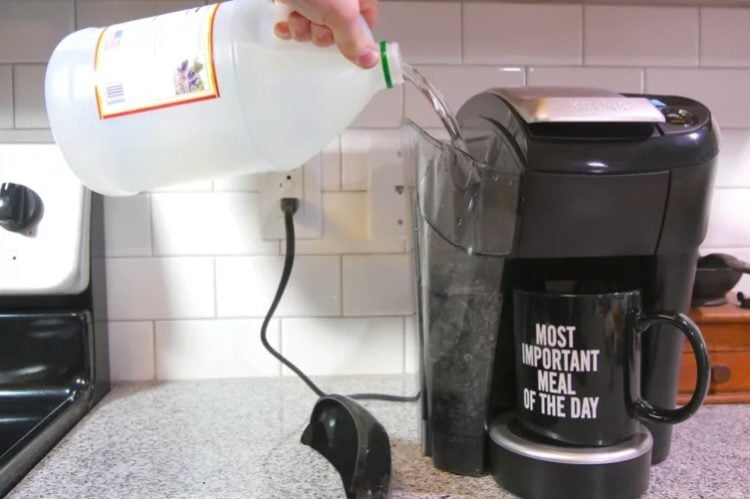
- Pour the Solution into the Reservoir: Carefully pour the vinegar and water mixture into the coffee maker’s water reservoir. Ensure it’s filled to the maximum capacity or a level that you deem appropriate.
- Run a Brewing Cycle: Place a coffee filter in the filter basket (if your coffee maker uses them). Then, turn on the coffee maker and let it run a full brewing cycle. This allows the vinegar solution to circulate through the system, dissolving mineral deposits and cleaning the internal components.
- Pause and Soak (Optional, but Recommended): After the brewing cycle is complete, turn off the coffee maker and allow the vinegar solution to sit in the reservoir for about 30 minutes. This gives the vinegar extra time to work its magic on stubborn buildup.
- Run a Fresh Water Cycle: After the soaking period (or directly after the first brewing cycle), discard the vinegar solution. Fill the water reservoir with fresh, clean water. Run a full brewing cycle to rinse away any remaining vinegar residue. Repeat this step at least once, or until you no longer detect a vinegar smell.
- Clean Removable Parts: While the coffee maker is running its cleaning cycles, wash any removable parts, such as the carafe, filter basket, and lid, with warm, soapy water. Rinse thoroughly and let them air dry.
- Final Inspection: Once the cleaning process is complete, inspect the coffee maker for any remaining residue or buildup. If necessary, repeat the cleaning process.
By following these steps, you’ll effectively learn how to clean a coffee maker with vinegar and water, revitalizing your coffee maker and ensuring a delicious brew every time.
Beyond the Basics: Tips and Considerations
While the vinegar and water method is highly effective, here are some additional tips to enhance your coffee maker cleaning routine:
- Frequency: Clean your coffee maker with vinegar and water every 1-3 months, depending on how frequently you use it and the hardness of your water. For heavy users or those with hard water, monthly cleaning is recommended.
- Water Hardness: If you have hard water, consider using filtered water in your coffee maker to reduce mineral buildup.
- Alternative Cleaners: While vinegar is the most common and effective method, you can also use commercial coffee maker cleaning solutions. Follow the manufacturer’s instructions carefully.
- Regular Maintenance: In addition to deep cleaning, regularly wipe down the exterior of your coffee maker and remove any coffee grounds or spills.
- Descaling Indicators: Some coffee makers have descaling indicators that alert you when it’s time to clean them. Pay attention to these signals.
- Rinse Thoroughly: Ensuring all vinegar residue is removed is crucial. Incomplete rinsing can impart a sour taste to your coffee.
Understanding these tips further enhances your ability of how to clean a coffee maker with vinegar and water.
Troubleshooting Common Issues
Even with the best cleaning practices, you might encounter some issues. Here are some troubleshooting tips:
- Persistent Vinegar Smell: Run several additional water cycles until the smell disappears.
- Slow Brewing: This could indicate significant mineral buildup. Repeat the cleaning process or consider using a commercial descaling solution.
- Coffee Tastes Sour: This might be due to remaining vinegar residue. Run more rinse cycles. Also, ensure all removable parts are thoroughly rinsed.
- Clogged Coffee Maker: If your coffee maker is completely clogged, it might require professional cleaning or repair.
The Verdict: Embrace the Clean Coffee Maker
Mastering how to clean a coffee maker with vinegar and water is a simple yet impactful step in maintaining a high-quality coffee experience. It’s an investment in the longevity of your appliance and, more importantly, in the taste of your morning brew. By following the steps outlined in this guide, you can ensure your coffee maker remains a reliable and efficient companion for years to come.
Regular maintenance, including cleaning your coffee maker with vinegar and water, is a simple yet effective way to ensure that your coffee always tastes its best. Take the time to care for your coffee maker, and it will reward you with countless cups of delicious coffee.
The process of how to clean a coffee maker with vinegar and water is a crucial element in the lifecycle of your appliance. Don’t underestimate its importance. Now go forth and brew with confidence, knowing your coffee maker is clean and ready to perform at its peak.
[See also: Best Coffee Makers Under $100] [See also: How to Clean a Keurig Coffee Maker] [See also: The Ultimate Guide to Coffee Bean Storage] [See also: Top Coffee Grinders for Home Brewing] [See also: The Impact of Water Quality on Coffee Taste]

