
Blooming Beauty: A Step-by-Step Guide on How to Make a Flower with Coffee Filters
In a world saturated with fleeting trends and disposable products, the simple act of creation can be a powerful antidote. Today, we delve into a craft that is both accessible and rewarding: learning how to make a flower with coffee filters. This isn’t just a craft; it’s a chance to transform an everyday item into a testament to beauty and ingenuity. Whether you’re a seasoned crafter or a complete novice, this guide will provide you with the knowledge and inspiration to create stunning paper flowers.
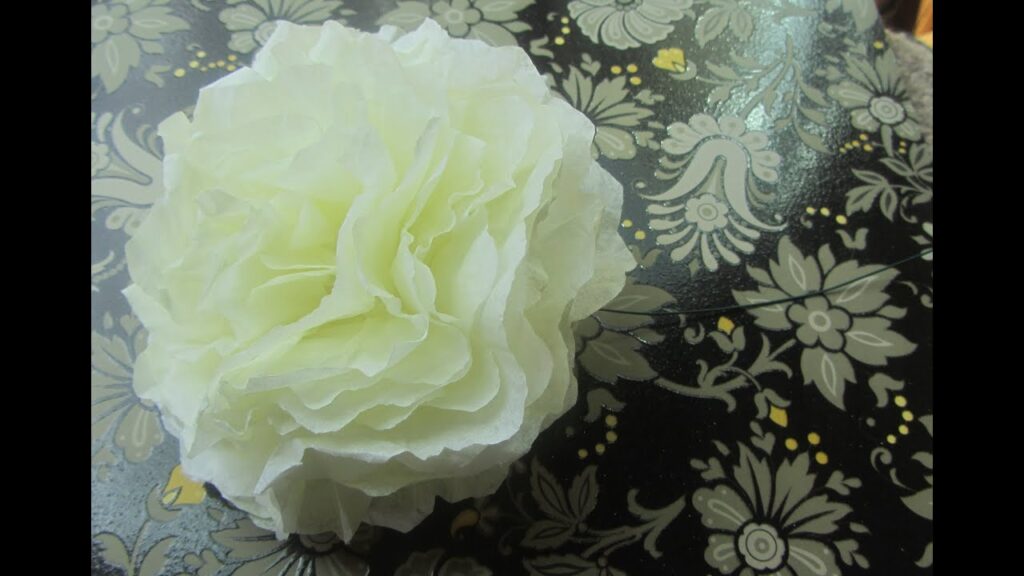
The appeal of crafting flowers from coffee filters lies in its simplicity and affordability. Coffee filters are readily available, inexpensive, and offer a unique texture that lends itself beautifully to floral creations. The delicate translucence of the filter allows for a play of light and shadow, adding depth and realism to your flowers. This guide will walk you through the process, step-by-step, ensuring a successful and enjoyable crafting experience.
Gathering Your Supplies
Before embarking on this creative journey, it’s essential to gather all the necessary materials. Fortunately, the list is short and sweet, making this project incredibly accessible. Here’s what you’ll need:
- Coffee Filters: The star of the show! You can use any size or shape, but standard basket filters are a great starting point. Consider experimenting with different types of filters, such as bleached or unbleached, to achieve different effects.
- Scissors: Sharp scissors are crucial for precise cutting.
- Glue: A glue gun with hot glue is recommended for its quick adhesion, but liquid craft glue can also work.
- Floral Wire: This will serve as the stem of your flower. You can find floral wire at most craft stores.
- Green Floral Tape: Used to wrap the floral wire and create a realistic stem.
- Paint or Dye (Optional): To add color to your flowers. Acrylic paints, watercolors, or even food coloring can be used.
- Paintbrushes (Optional): For applying paint or dye.
- Pencil (Optional): For tracing patterns or creating guidelines.
Once you have all your materials, you’re ready to begin. Remember that the quality of your supplies can impact the final result, so choose materials that you enjoy working with. This is especially true when learning how to make a flower with coffee filters.
Step-by-Step Guide: Crafting Your Coffee Filter Flower
Now, let’s get down to the core of the matter: the creation process. This step-by-step guide will walk you through how to make a flower with coffee filters, ensuring a beautiful outcome. Don’t be afraid to experiment and add your personal touch!
Step One: Preparing the Coffee Filters
The first step involves preparing the coffee filters. You have several options here, depending on the look you want to achieve:
- Flat Filters: Simply stack a few filters on top of each other. The number of filters you use will determine the fullness of your flower.
- Folded Filters: Fan-fold the filters, accordion-style. This creates a more textured and layered effect.
- Cut Filters: Experiment with cutting the edges of the filters before assembling the flower. This can add visual interest and variety. Try different shapes like rounded petals, pointed petals, or even fringe the edges.
Choose the method that best suits your desired aesthetic.
Step Two: Adding Color (Optional)
If you want to add color to your flowers, this is the time. There are several ways to achieve this:
- Painting: Use acrylic paints or watercolors to paint the filters. Let them dry completely before assembling the flower.
- Dyeing: Dip the filters in a dye solution, such as food coloring mixed with water. This is a quick and easy way to add color.
- Staining: Use tea or coffee to stain the filters for a vintage, aged look.
Allow the filters to dry completely after coloring. This is an important step to ensure the colors set and don’t bleed during assembly.
Step Three: Assembling the Flower
This is where your flower begins to take shape. Here’s how to assemble it:
- Stack the Filters: If you haven’t already, stack the prepared coffee filters on top of each other.
- Pinch and Secure: Pinch the center of the stacked filters and secure them with glue. This will be the base of your flower.
- Fluff the Petals: Gently separate the layers of the filters, one by one, to create petals. The more layers you have, the fuller your flower will be.
- Shape the Petals: Gently curve the petals to give them a more realistic shape. You can use your fingers or a pencil to curl the edges.
Take your time with this step to create a beautiful, realistic flower.
Step Four: Adding the Stem
Now it’s time to add the stem. This is what you’ll do:
- Insert the Wire: Pierce the floral wire through the center of the flower, where you glued the filters together.
- Secure the Wire: Use hot glue to secure the wire to the base of the flower.
- Wrap the Stem: Wrap the floral tape around the wire, starting at the base of the flower and working your way down. Overlap the tape slightly as you go to ensure a secure and seamless stem.
- Shape the Stem: Bend and shape the stem as needed.
And there you have it! Your coffee filter flower is complete. This guide provides a solid foundation for understanding how to make a flower with coffee filters.
Tips and Tricks for Crafting Success
While the process of how to make a flower with coffee filters is relatively straightforward, there are some tips and tricks that can help you achieve even better results:
- Experiment with Colors and Patterns: Don’t be afraid to experiment with different colors, dyes, and patterns. Try ombre effects, tie-dye techniques, or adding details with markers or pens.
- Vary the Filter Sizes: Use different sizes of coffee filters to create flowers with varying sizes and shapes.
- Add Embellishments: Consider adding embellishments like glitter, beads, or sequins to your flowers for added sparkle and dimension.
- Use Different Types of Glue: While hot glue is recommended, you can experiment with other types of glue, such as liquid craft glue or even glue sticks, to see what works best for you.
- Practice Makes Perfect: Don’t be discouraged if your first attempt isn’t perfect. The more you practice, the better you’ll become.
These tips will help you refine your technique and enhance your creative possibilities when learning how to make a flower with coffee filters.
Beyond the Basics: Creative Variations
Once you master the basic techniques of how to make a flower with coffee filters, you can explore a wide range of creative variations:
- Layered Flowers: Create flowers with multiple layers of petals to add depth and complexity.
- Multi-Colored Flowers: Use multiple colors of paint or dye to create vibrant and eye-catching flowers.
- Themed Flowers: Create flowers for specific occasions, such as weddings, birthdays, or holidays.
- Floral Arrangements: Arrange your coffee filter flowers in vases, bouquets, or wreaths.
- Mixed Media: Combine coffee filter flowers with other craft materials, such as felt, paper, or fabric, to create unique and interesting designs.
The possibilities are endless! The key is to experiment and have fun.
Uses for Your Coffee Filter Flowers
The beauty of these creations extends beyond the crafting process; there are many ways to utilize your coffee filter flowers:
- Home Decor: Use them to decorate your home, adding a touch of elegance and charm to any room.
- Gift Embellishments: Attach them to gifts to add a personal touch.
- Party Decorations: Use them to decorate parties, weddings, or other special events.
- Craft Projects: Incorporate them into various craft projects, such as scrapbooking, card making, or mixed media art.
- Selling: Sell your creations at craft fairs, online marketplaces, or local boutiques.
Your creativity can transform these flowers into something both beautiful and functional.
Troubleshooting Common Issues
Even with the most comprehensive guide, you might encounter a few challenges. Here’s how to address some common issues:
- Petals are too flat: Gently curve the petals with your fingers or a pencil to add shape and dimension.
- Glue is visible: Use a small amount of glue and try to hide it between the layers of the filters.
- Colors are bleeding: Allow the paint or dye to dry completely before assembling the flower. Consider using a sealant to prevent bleeding.
- Flower is not sturdy: Ensure the filters are securely glued together and that the stem is properly attached.
Troubleshooting is part of the creative process. Don’t be afraid to experiment and learn from your mistakes.
Conclusion: The Enduring Appeal of Coffee Filter Crafts
Learning how to make a flower with coffee filters is more than just a craft; it’s a therapeutic and rewarding activity. It’s a chance to disconnect from the digital world and reconnect with your creative spirit. It’s a way to transform simple, everyday materials into beautiful works of art. The skills you learn can be applied to countless other craft projects, opening doors to new creative avenues. The accessibility and affordability of the materials make it a perfect project for all ages and skill levels. Embracing this craft allows you to express your creativity and create beautiful, lasting memories.
So, gather your supplies, follow the steps, and let your imagination bloom. The world of coffee filter flowers awaits! [See also: How to Make Paper Flowers with Tissue Paper], [See also: DIY Paper Flower Decoration Ideas], [See also: Best Crafting Glue for Paper Flowers]
By mastering this skill, you’re not just learning a craft; you’re embracing a form of self-expression, mindfulness, and the joy of creating something beautiful from the simplest of materials. The act of making flowers is a timeless endeavor, and learning how to make a flower with coffee filters is an accessible and fulfilling way to participate in this tradition. Embrace the process, experiment with different techniques, and enjoy the journey.

