Unveiling the Secrets: How Do You Stain Paper with Coffee and Achieve a Vintage Aesthetic?
In a world saturated with digital interfaces, there’s a certain allure to the tangible, the handcrafted, the beautifully aged. The practice of staining paper with coffee is a testament to this yearning for authenticity, offering a simple yet profoundly effective method to imbue ordinary paper with a warm, vintage aesthetic. This article delves into the intricacies of how do you stain paper with coffee, exploring the techniques, tips, and creative possibilities that await.
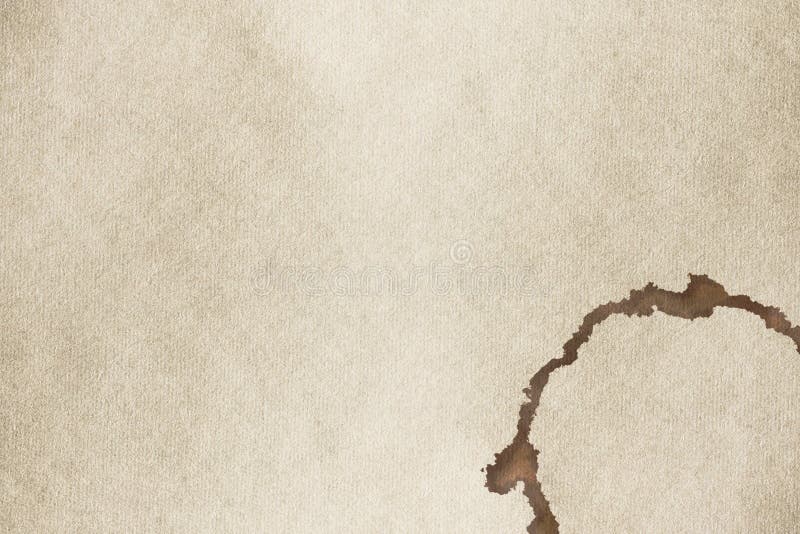
The appeal of coffee-stained paper extends beyond mere aesthetics. It’s a gateway to a world of creative expression, from crafting personalized journals and aged maps to adding a touch of history to scrapbooking projects and artistic endeavors. This guide provides a comprehensive overview, ensuring that even the most novice crafter can achieve stunning results.
The Allure of Aged Paper
Before diving into the process, it’s worth considering the appeal of aged paper. The gentle hues, the subtle imperfections – they evoke a sense of history, of stories untold. This aesthetic is often associated with antique books, vintage maps, and handwritten letters. How do you stain paper with coffee becomes the key to unlocking this aesthetic, allowing you to mimic the effects of time and create pieces that feel both familiar and unique.
The coffee stain process not only changes the color of the paper but also subtly alters its texture. The coffee can cause the paper fibers to swell slightly, creating a more tactile surface. This added dimension makes the finished product even more appealing, enhancing the overall sensory experience.
Gathering Your Supplies: Essential Tools and Materials
The beauty of staining paper with coffee lies in its simplicity. The required materials are readily available, making this a project accessible to everyone. Here’s a list of essentials:
- Coffee: This is the star of the show! Use brewed coffee. The strength of the coffee will affect the intensity of the stain. Experiment with different roasts and strengths to find your preferred shade.
- Paper: Any type of paper will work, but the results will vary. Thicker paper, such as cardstock or watercolor paper, tends to absorb the stain more evenly and can withstand the staining process better. Consider the paper’s weight and absorbency.
- Container: A shallow container, such as a baking dish or a tray, will be used to hold the coffee. Ensure it’s large enough to accommodate the size of your paper.
- Sponge or Brush: A sponge or brush is necessary for applying the coffee to the paper. A sponge will provide a more even coverage, while a brush can create more textured effects.
- Optional: Gloves (to protect your hands), a drying rack or clothesline, and a flat surface for drying.
Having the right supplies is the first step in learning how do you stain paper with coffee. Ensure that you have all the components before you begin.
Step-by-Step Guide: Mastering the Coffee Staining Technique
Now, let’s explore the step-by-step process of how do you stain paper with coffee. This guide provides a detailed walkthrough to help you achieve the perfect vintage look:
- Brew the Coffee: Brew your coffee using your preferred method. Allow it to cool to room temperature. Hot coffee can warp the paper.
- Prepare the Paper: Place your paper on a flat, protected surface. Ensure the surface is waterproof to avoid any accidental staining.
- Apply the Coffee: There are two primary methods for applying the coffee:
- Immersion: Submerge the paper in the coffee solution for a short period. The longer the paper is submerged, the darker the stain will be.
- Brushing/Sponging: Dip your sponge or brush into the coffee and apply it to the paper. This method allows for more control over the stain’s distribution.
- Control the Shade: Experiment with the coffee strength and the application method to achieve your desired shade. Lighter stains can be achieved with weaker coffee or shorter immersion times. Darker stains require stronger coffee or longer immersion.
- Remove Excess Coffee: If immersing, gently lift the paper from the coffee and allow the excess liquid to drip off. Blot the paper with a paper towel to remove any remaining excess coffee.
- Drying the Paper: Allow the paper to dry completely. This can be done by laying it flat on a drying rack, hanging it on a clothesline, or using a hairdryer on a low setting. Avoid direct sunlight, which can fade the stain.
- Assess and Repeat (If Necessary): Once dry, assess the result. If you desire a darker shade, repeat the process.
By following these steps, you’ll be well on your way to mastering how do you stain paper with coffee.
Troubleshooting Common Issues
Even with the most careful approach, issues can arise. Here are some common problems and their solutions:
- Uneven Staining: This can be caused by uneven coffee application or paper absorption. Ensure even coverage when applying the coffee. For immersion, make sure the paper is fully submerged.
- Warping: Paper can warp if it absorbs too much liquid. Use thicker paper, and avoid over-saturating the paper with coffee.
- Fading: Direct sunlight can cause the stain to fade. Dry the paper in a shaded area.
- Blotchy Appearance: This can be caused by using a brush that is too dry. Make sure your brush is adequately saturated with coffee.
Understanding these potential issues and their solutions will help you troubleshoot and refine your technique for how do you stain paper with coffee.
Creative Applications: Beyond the Basics
Once you’ve mastered the basic technique of how do you stain paper with coffee, the creative possibilities are endless. Here are some ideas to get you started:
- Journaling: Create unique journal pages with a vintage feel.
- Scrapbooking: Add an aged look to your scrapbooking projects.
- Artistic Projects: Use the stained paper as a base for drawings, paintings, or collages.
- Mapmaking: Create your own personalized maps.
- Letter Writing: Craft beautiful, aged letters.
Experiment with different techniques, such as adding salt to the coffee for a speckled effect or using stencils to create patterns. The only limit is your imagination.
Tips and Tricks for the Perfect Stain
Here are a few additional tips to help you achieve the perfect coffee stain:
- Experiment with coffee types: Different coffee roasts will produce different hues.
- Test on scrap paper: Before staining your final project, test the technique on scrap paper to ensure you achieve the desired result.
- Use gloves: Coffee stains can stain your hands. Wear gloves to protect your skin.
- Consider the paper’s weight: Thicker paper is less likely to warp.
- Allow for complete drying: Ensure the paper is completely dry before handling or using.
These additional tips will further enhance your ability to how do you stain paper with coffee and create the perfect aged effect.
Preserving Your Coffee-Stained Creations
Once you’ve created your coffee-stained masterpieces, it’s important to preserve them. Here are some tips:
- Store in a cool, dry place: This will help prevent fading and damage.
- Avoid direct sunlight: Sunlight can fade the stain over time.
- Use archival-quality materials: If you’re creating a project that you want to last for a long time, use archival-quality paper and inks.
- Consider a sealant: A sealant can protect the paper from moisture and wear.
Proper preservation will ensure that your creations last for years to come.
Conclusion: Embracing the Art of Coffee Staining
Learning how do you stain paper with coffee is a rewarding endeavor. It’s a simple yet effective technique that can transform ordinary paper into something extraordinary. From crafting vintage journals to creating unique artwork, the possibilities are endless. Embrace the process, experiment with different techniques, and enjoy the journey of creating beautiful, aged paper.
The art of coffee staining is a testament to the enduring appeal of handcrafted items and the beauty of imperfection. It’s a way to connect with the past, express your creativity, and create something truly unique. So, gather your supplies, brew a fresh pot of coffee, and embark on this exciting creative journey.
[See also: How to Make a Vintage Map, Scrapbooking Tips for Beginners, Creative Journaling Ideas]

