Brewing Brilliance: A Comprehensive Guide on How to Clean Your One Cup Keurig Coffee Maker
The aroma of freshly brewed coffee. It’s a morning ritual, a mid-afternoon pick-me-up, and for many, an indispensable part of daily life. But what happens when your trusty one cup Keurig coffee maker, the appliance that delivers this daily dose of delight, starts to underperform? The culprit is often a buildup of mineral deposits, coffee oils, and general grime, all of which can significantly impact the taste and efficiency of your brewing experience. This comprehensive guide will walk you through how to clean your one cup Keurig coffee maker, ensuring you continue to enjoy the perfect cup, every time.
Regular cleaning isn’t just about maintaining the flavor of your coffee; it’s also about extending the lifespan of your Keurig. Neglecting this essential maintenance can lead to clogs, reduced water flow, and even complete machine failure. Cleaning your Keurig is an investment in your appliance and your daily coffee ritual. We’ll delve into the why and how, providing you with the knowledge and tools to keep your Keurig running smoothly for years to come. The process, while simple, is crucial. This guide will equip you with the steps necessary to address the common issues that arise with a Keurig, focusing specifically on cleaning your one cup Keurig coffee maker.
Understanding the Importance of Cleaning Your Keurig
Before we dive into the practical steps, it’s crucial to understand why cleaning your Keurig is so important. The primary reason is mineral buildup. Tap water, even filtered water, contains minerals like calcium and magnesium. Over time, these minerals accumulate inside the Keurig, forming hard, chalky deposits. This buildup can clog the water lines, slow down the brewing process, and ultimately diminish the coffee’s flavor. Furthermore, coffee oils, which are released during brewing, can also accumulate, leading to a stale and bitter taste.
Beyond the impact on taste and efficiency, a dirty Keurig can also harbor bacteria and mold. The warm, moist environment inside the machine is an ideal breeding ground for these unwanted microorganisms. Regular cleaning, therefore, is a hygienic necessity. By following the cleaning procedures outlined in this guide, you’re not just ensuring a great-tasting cup of coffee; you’re also safeguarding your health.
Essential Supplies You’ll Need
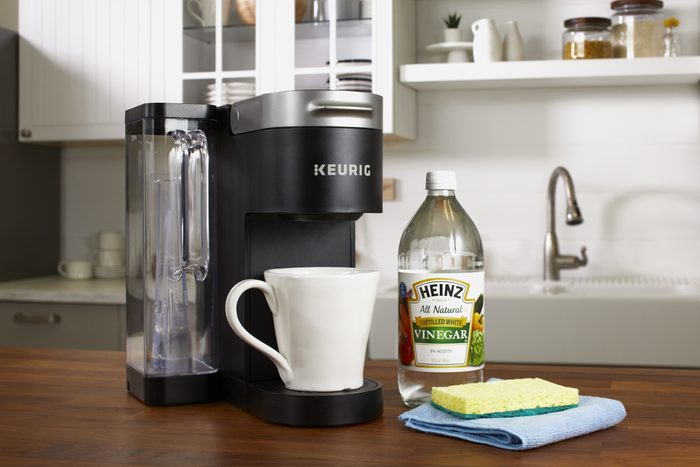
Fortunately, cleaning your one cup Keurig coffee maker doesn’t require a vast array of specialized equipment. Most of the items you’ll need are readily available in your home. Here’s a list of essential supplies:
- White Vinegar: This is your primary descaling agent. White vinegar effectively dissolves mineral deposits without damaging the Keurig.
- Water: Distilled or filtered water is preferred for rinsing.
- Dish Soap: Mild dish soap is used for washing removable parts.
- A Large Mug or Container: For descaling and rinsing.
- A Soft Cloth or Sponge: For wiping down the exterior.
- Paper Towels: For drying components.
- Optional: Keurig Descaling Solution: While not strictly necessary, Keurig’s descaling solution can be used as an alternative to vinegar.
Having these supplies on hand will make the cleaning process smooth and efficient. Before beginning, ensure you have all the necessary items ready to avoid interruptions.
Step-by-Step Guide: Cleaning Your One Cup Keurig Coffee Maker
Now, let’s get down to the practical steps of cleaning your one cup Keurig coffee maker. This process can be broken down into several key stages, ensuring a thorough and effective cleaning experience.
Step One: Prepare the Machine
Before you start, unplug your Keurig and allow it to cool down completely. This is a safety precaution and also allows for easier handling. Remove the water reservoir and any K-Cup pods from the machine. Disassemble any removable parts, such as the drip tray and the K-Cup pod holder. These components will be cleaned separately.
Step Two: Descaling with Vinegar
Descaling is the most crucial step in removing mineral buildup. Fill the water reservoir with a mixture of equal parts white vinegar and water. Place a large mug or container on the drip tray to catch the solution. Turn on the Keurig and brew without a K-Cup pod. Repeat this process until the water reservoir is empty. This allows the vinegar solution to circulate through the internal components, dissolving mineral deposits.
Step Three: Rinsing with Water
After descaling, it’s essential to rinse the Keurig thoroughly to remove any vinegar residue. Rinse the water reservoir and fill it with fresh water. Brew several cycles of plain water, again without a K-Cup pod, until the water reservoir is empty. This ensures all traces of vinegar are flushed out, preventing any lingering sour taste in your coffee.
Step Four: Cleaning Removable Parts
While the descaling process is underway, it’s time to clean the removable parts. Wash the drip tray, K-Cup pod holder, and water reservoir with warm, soapy water. Rinse them thoroughly and allow them to air dry or pat them dry with a clean paper towel. Pay close attention to the K-Cup pod holder, as coffee grounds and oils can easily accumulate here. This step is a critical part of learning how to clean your one cup Keurig coffee maker effectively.
Step Five: Cleaning the Exterior
Wipe down the exterior of the Keurig with a soft, damp cloth. Avoid using abrasive cleaners, as they can scratch the surface. Pay attention to any areas where spills or splashes may have occurred. Once clean, dry the exterior with a clean paper towel.
Step Six: Reassembly and Final Check
Once all components are dry, reassemble the Keurig. Replace the water reservoir, drip tray, and K-Cup pod holder. Fill the water reservoir with fresh water and run a final brewing cycle to ensure everything is functioning correctly. Your one cup Keurig coffee maker should now be clean and ready to brew the perfect cup of coffee.
Troubleshooting Common Issues
Even after cleaning, you might encounter some issues. Here are some common problems and their solutions:
- Slow Brewing: This is often a sign of remaining mineral buildup. Repeat the descaling process.
- Weak Coffee: This could be due to a clogged needle. Use a paper clip or the Keurig needle cleaning tool to clear any obstructions.
- Off-Tasting Coffee: Ensure you’ve rinsed the Keurig thoroughly after descaling. Also, consider using filtered water.
- Machine Not Brewing: Check for clogs in the needle or water lines. Descale the machine.
If problems persist, refer to your Keurig’s user manual or contact Keurig customer support. Understanding how to clean your one cup Keurig coffee maker can help prevent many of these issues.
How Often Should You Clean Your Keurig?
The frequency of cleaning depends on how often you use your Keurig and the hardness of your water. As a general guideline:
- Descaling: Descale your Keurig every 1–3 months, or more frequently if you use it heavily or have hard water.
- Removable Parts: Wash removable parts weekly or more frequently, depending on usage.
- Exterior: Wipe down the exterior as needed to keep it clean.
Regular maintenance will extend the life of your machine and ensure the best-tasting coffee. The more frequently you clean your Keurig, the better the coffee will taste and the less likely you are to encounter problems. Consistent cleaning is key to understanding how to clean your one cup Keurig coffee maker and maintaining its performance.
Alternative Cleaning Methods
While vinegar is the most common and effective descaling agent, there are alternative methods you can consider:
- Keurig Descaling Solution: Keurig offers its own descaling solution, which is specifically designed for their machines. Follow the instructions on the bottle.
- Lemon Juice: Lemon juice can also be used as a descaling agent, although it may not be as effective as vinegar. Dilute lemon juice with water and follow the same descaling process.
- Baking Soda: Baking soda can be used to clean the exterior and removable parts. Mix baking soda with water to create a paste and gently scrub the surfaces.
Always ensure you rinse the machine thoroughly after using any cleaning solution.
Conclusion: Brewing Perfection Starts with Cleanliness
Mastering how to clean your one cup Keurig coffee maker is an essential skill for any coffee lover. By following the steps outlined in this guide, you can ensure your Keurig continues to deliver the perfect cup, day after day. Regular cleaning not only enhances the taste of your coffee but also prolongs the life of your machine and safeguards your health. Make cleaning a regular part of your coffee routine, and you’ll enjoy the full potential of your Keurig for years to come. The little bit of effort put into learning how to clean your one cup Keurig coffee maker properly will significantly improve your coffee drinking experience.
By taking the time to understand the importance of cleaning and following the simple steps outlined in this guide, you can ensure that your Keurig continues to perform at its best, delivering that perfect cup of coffee every morning. Remember, a clean Keurig is a happy Keurig, and a happy Keurig means a happier you. Your mornings will never be the same. [See also: How to Clean Your Coffee Maker with Vinegar, Troubleshooting Keurig Coffee Makers, Best Coffee Maker Cleaners]

