Brewing Perfection: A Comprehensive Guide to Keurig Coffee Maker Operating Instructions
The Keurig coffee maker has revolutionized the morning ritual for millions. Its single-serve convenience and diverse beverage options have made it a staple in homes and offices alike. However, to fully unlock the potential of your Keurig, understanding the Keurig coffee maker operating instructions is paramount. This guide delves into the intricacies of brewing with Keurig, ensuring you consistently produce the perfect cup. From initial setup to troubleshooting, we’ll cover everything you need to know.
Understanding Your Keurig Model
Before diving into the specifics of Keurig coffee maker operating instructions, it’s crucial to identify your specific model. Keurig offers a diverse range of machines, each with slightly different features and functionalities. Common models include the K-Classic, K-Elite, K-Select, and K-Cafe, among others. The Keurig coffee maker operating instructions for each model often vary, primarily in terms of control panel design and additional features like strength control or iced coffee settings. Consult the user manual that came with your machine for model-specific instructions. If you’ve misplaced your manual, you can usually find a digital copy on the Keurig website by searching for your model number.
Initial Setup and Preparation
The initial setup of your Keurig is generally straightforward. However, following the Keurig coffee maker operating instructions meticulously ensures optimal performance and longevity. Here’s a step-by-step guide:
- Unpacking and Inspection: Carefully unpack your Keurig coffee maker and inspect all components. Ensure everything is present and undamaged. This includes the water reservoir, drip tray, K-Cup pod holder, and any additional accessories.
- Cleaning: Before first use, clean all removable parts with warm, soapy water. Rinse thoroughly and allow them to air dry. This removes any manufacturing residue and prepares your machine for brewing.
- Filling the Water Reservoir: Fill the water reservoir with fresh, filtered water. The reservoir capacity varies depending on the model; consult your Keurig coffee maker operating instructions for the specific capacity.
- Powering On: Plug the coffee maker into a grounded electrical outlet and turn it on. Your Keurig will likely have a power button or switch.
- Initial Brewing Cycle: Many Keurig models require an initial brewing cycle to prime the system. This typically involves brewing a cup of hot water without a K-Cup pod. This removes any residual manufacturing debris and ensures the machine is functioning correctly. Refer to your Keurig coffee maker operating instructions for specific instructions on the initial brew cycle for your model.
Brewing Your First Cup: Step-by-Step Instructions
Once your Keurig is set up, brewing a cup of coffee is a simple process. The Keurig coffee maker operating instructions detail this process, but here’s a general overview:
- Power On and Heat Up: Ensure your Keurig is powered on. The machine will typically take a few minutes to heat up. An indicator light will usually signal when it’s ready.
- Add Water: Check the water level in the reservoir and add more water if needed.
- Insert a K-Cup Pod: Open the K-Cup pod holder and insert your chosen K-Cup pod. Ensure the foil lid is facing upwards. Close the pod holder securely.
- Select Cup Size: Choose your desired cup size using the buttons on the control panel. Common options include 6 oz, 8 oz, 10 oz, and 12 oz. Some models offer larger sizes.
- Brew: Press the brew button. The machine will dispense hot water through the K-Cup pod and into your mug.
- Enjoy: Once brewing is complete, carefully remove your mug and enjoy your freshly brewed coffee.
Always consult your specific Keurig coffee maker operating instructions for model-specific details, as button layouts and features can vary.
Understanding the Control Panel
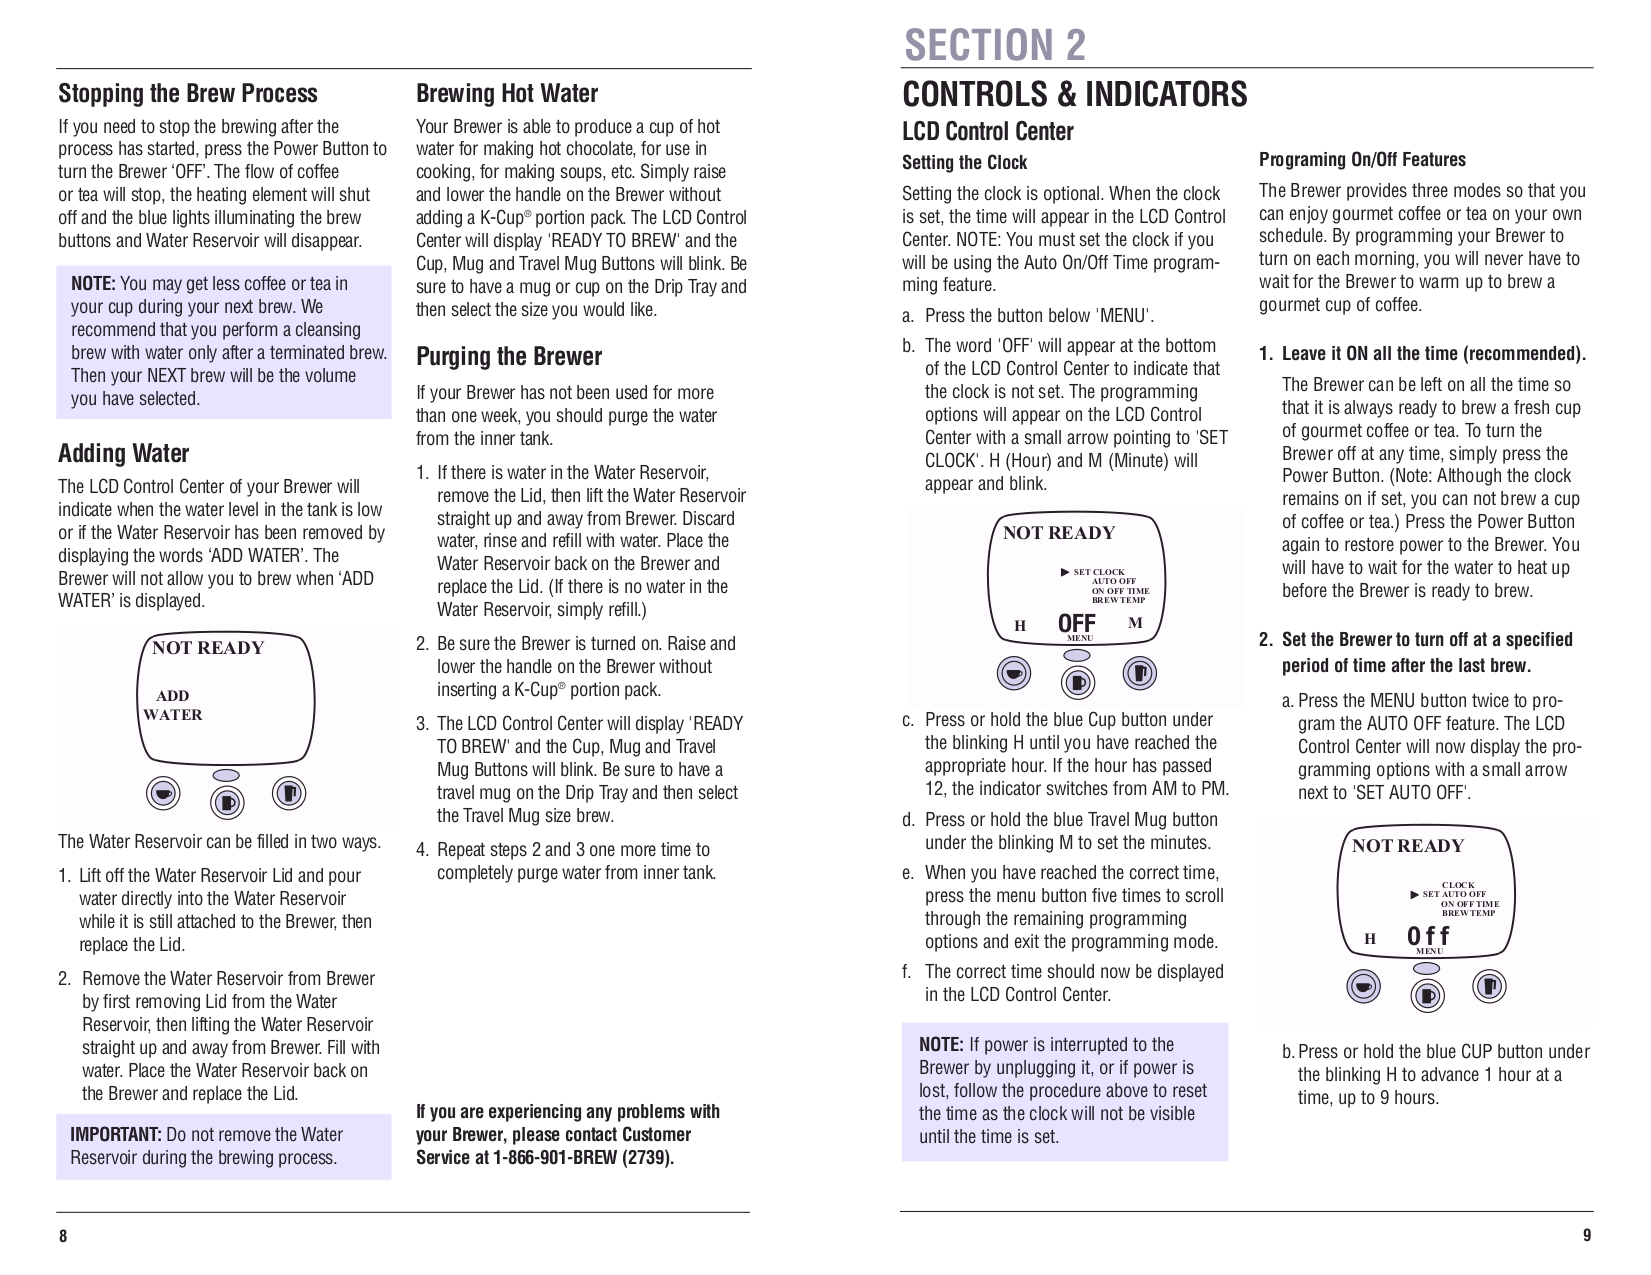
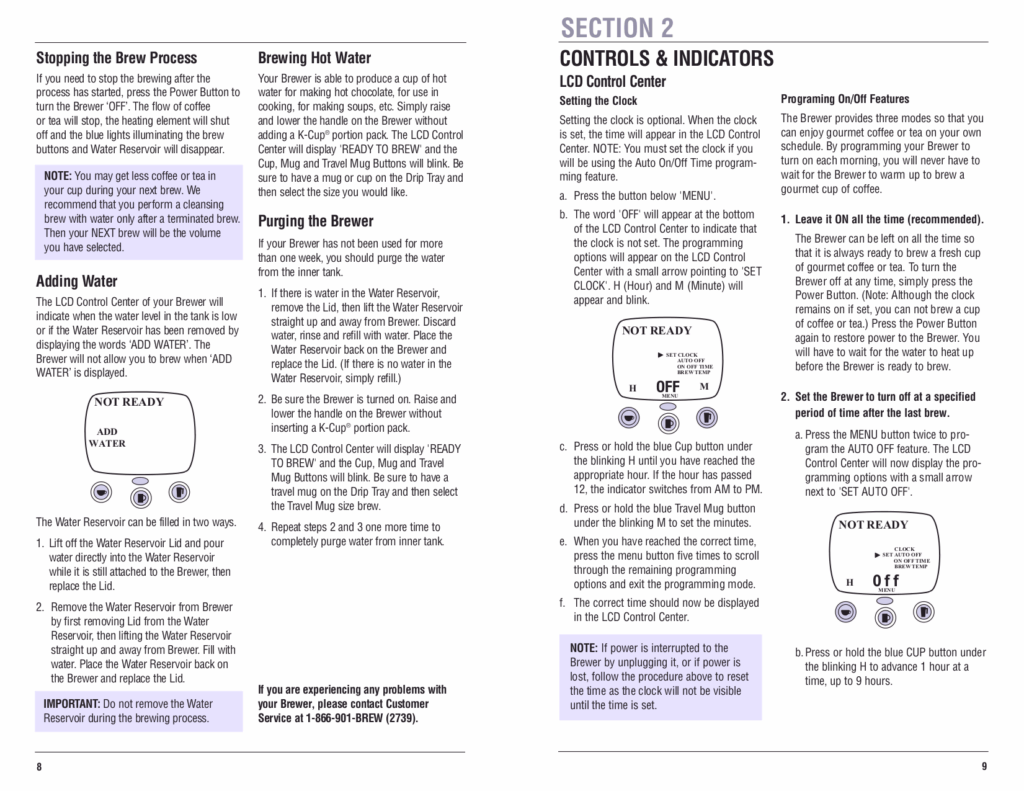
The control panel is your interface with the Keurig. Familiarizing yourself with its functions is crucial for optimal use. The Keurig coffee maker operating instructions often include a diagram of the control panel, but here are some common features:
- Power Button: Turns the machine on and off.
- Brew Button: Initiates the brewing process.
- Cup Size Buttons: Selects the desired cup size.
- Strength Control (if applicable): Adjusts the strength of your coffee.
- Iced Coffee Setting (if applicable): Optimizes brewing for iced coffee.
- Auto-Off Feature (if applicable): Automatically shuts off the machine after a period of inactivity.
- Water Filter Indicator (if applicable): Alerts you when it’s time to replace the water filter.
Cleaning and Maintenance: Keeping Your Keurig in Top Condition
Regular cleaning and maintenance are essential for keeping your Keurig coffee maker in top condition and extending its lifespan. The Keurig coffee maker operating instructions outline the recommended cleaning schedule. Here’s a general guide:
- Daily Cleaning: Rinse the drip tray and K-Cup pod holder after each use. Wipe down the exterior of the machine with a damp cloth.
- Weekly Cleaning: Wash the water reservoir and lid with warm, soapy water. Rinse thoroughly.
- Monthly Descaling: Descale your Keurig monthly to remove mineral buildup. This is crucial for maintaining optimal performance and preventing clogs. Keurig sells descaling solution, or you can use a mixture of white vinegar and water. Follow the descaling instructions in your Keurig coffee maker operating instructions carefully. The process typically involves running a descaling solution through the machine several times, followed by multiple cycles of fresh water.
- Water Filter Replacement: Replace the water filter regularly, typically every two months or as indicated by the machine’s filter indicator.
Troubleshooting Common Issues
Even with proper care, you may encounter some issues with your Keurig. Here’s how to troubleshoot some common problems, referencing your Keurig coffee maker operating instructions when necessary:
- No Power: Check the power cord and outlet. Ensure the machine is plugged in securely and that the outlet is functioning.
- Not Brewing: Make sure the water reservoir is filled. Check for any clogs in the K-Cup pod holder or needle. Descale the machine if necessary.
- Weak Coffee: Try using a smaller cup size or a stronger K-Cup pod. Descale the machine.
- Slow Brewing: Descale the machine. Check for clogs.
- Error Messages: Consult your Keurig coffee maker operating instructions for specific error code meanings and troubleshooting steps.
- Leaking: Check the water reservoir and K-Cup pod holder for any cracks or damage. Ensure all components are properly seated.
If you’ve exhausted troubleshooting steps and are still experiencing problems, contact Keurig customer service for assistance. They can provide further guidance or arrange for repairs or replacements.
Maximizing Your Brewing Experience
Beyond the basic Keurig coffee maker operating instructions, here are some tips for maximizing your brewing experience:
- Use Fresh Water: Always use fresh, filtered water for the best-tasting coffee.
- Experiment with K-Cup Pods: Keurig offers a wide variety of K-Cup pods, including coffee, tea, hot chocolate, and more. Experiment to find your favorites.
- Clean Regularly: Consistent cleaning and maintenance are key to optimal performance and longevity.
- Preheat Your Mug: Preheating your mug can help keep your coffee hotter for longer.
- Consider a Reusable K-Cup Filter: A reusable K-Cup filter allows you to use your own ground coffee, giving you more control over the brewing process and reducing waste.
Beyond the Basics: Advanced Features and Tips
Some Keurig models offer advanced features that can enhance your brewing experience. Refer to your Keurig coffee maker operating instructions for specific features related to your model. These might include:
- Programmable Features: Some models allow you to program the machine to brew at a specific time.
- Multiple Cup Sizes: Experiment with different cup sizes to find your preferred brew.
- Strength Control: Adjust the strength of your coffee to match your preferences.
- Iced Coffee Settings: These settings optimize the brewing process for iced coffee, producing a stronger, more concentrated brew.
- Water Filter Reminders: Some models remind you when it’s time to change your water filter.
Conclusion: Mastering Your Keurig
Following the Keurig coffee maker operating instructions is the key to unlocking the full potential of your Keurig. By understanding the setup, brewing process, cleaning procedures, and troubleshooting tips, you can consistently enjoy delicious, perfectly brewed coffee with ease. Take the time to familiarize yourself with your specific model’s instructions, and you’ll be well on your way to brewing coffee like a pro. With proper care and attention, your Keurig will provide years of reliable service, making your mornings brighter and your coffee breaks more enjoyable. Mastering your Keurig is about more than just following the instructions; it’s about understanding the machine and adapting the process to your individual preferences. Enjoy your brewing journey!
[See also: How to Clean Your Keurig Coffee Maker, Best Keurig Coffee Makers of 2024, Keurig Troubleshooting Guide]

